
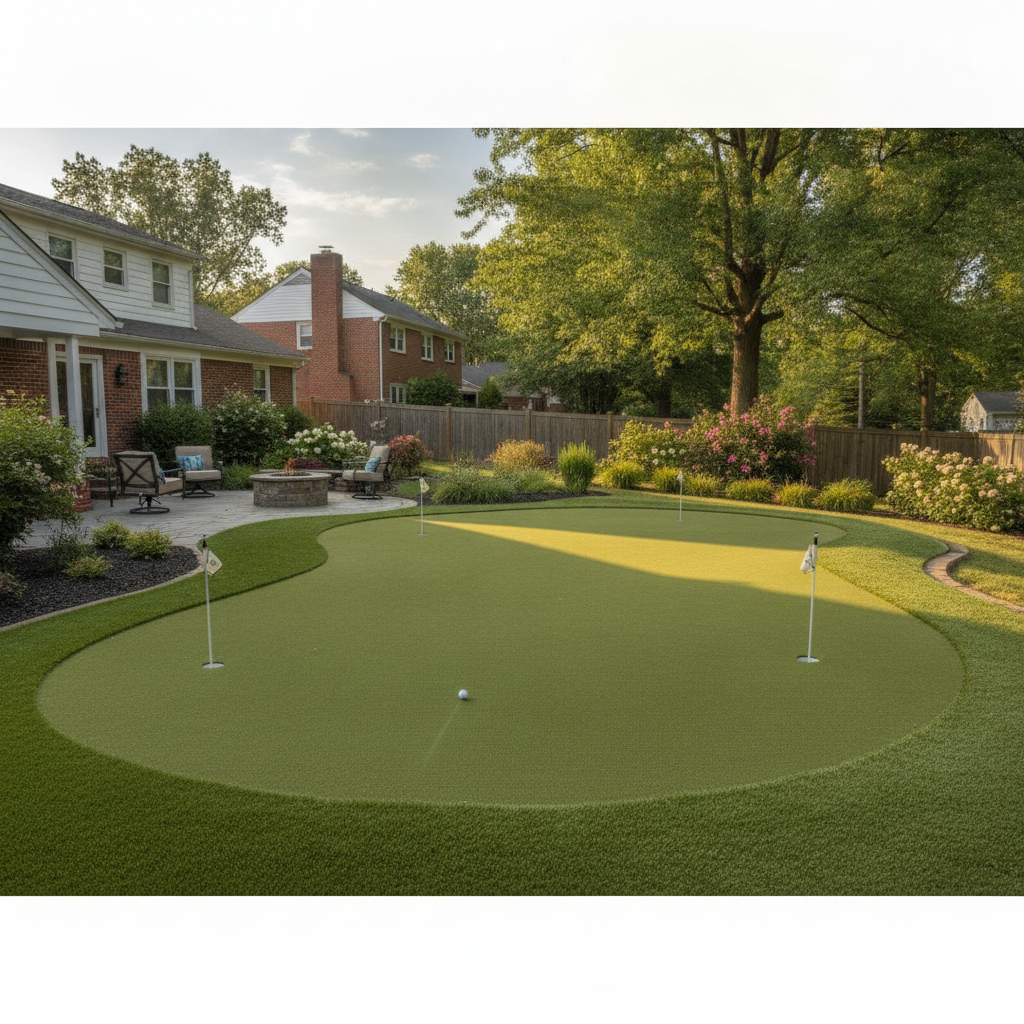
How Do You Design a Backyard Putting Green for Year-Round Use in Burke, VA? What Golf Enthusiasts Need to Know
Yes — a backyard putting green in Burke, VA can absolutely be used twelve months a year. But there’s a meaningful difference between a putting green that looks great in June and one that still putts true in February after three freeze-thaw cycles and a hard rain. If you’ve been thinking about converting part of your yard into a practice green, the design decisions you make upfront — base depth, drainage grade, turf fiber type, infill weight — will determine whether you’re rolling 10-foot birdie putts in November or watching your green bubble and shift after the first winter frost.
This guide covers what actually goes into a year-round backyard putting green installation in Fairfax County, where the climate demands more than a generic “roll and staple” kit from a big-box store.
Why DMV Winters Make Putting Green Base Prep More Critical Than You Think
Most putting green content online is written for Arizona or Southern California climates — places where the ground never freezes. Northern Virginia is a different story. Burke and the surrounding Fairfax County communities go through repeated freeze-thaw cycles from November through March. That kind of thermal stress is brutal on a poorly built base.
Here’s what happens when base prep is skipped or rushed: the crushed stone aggregate beneath the turf absorbs moisture, freezes, expands, and then contracts as it thaws. Over one or two winters, that movement causes seams to lift at the edges, undulation in the putting surface, and in some cases, standing water that has nowhere to drain after a heavy March rain. You won’t notice it on the day of installation. You’ll notice it the following spring when your six-foot putts are breaking three inches left of where they should.
A properly built putting green base in this region typically requires a minimum of 3–4 inches of compacted decomposed granite or crushed aggregate, graded to a consistent 1–2% slope for drainage, with a geotextile weed barrier below. The goal is a rigid, stable platform that doesn’t shift seasonally. This isn’t where you want to cut costs.
The Turf Product Actually Matters for Ball Roll — Here’s What to Look For
Not every artificial turf product is designed for putting. Landscape turf built for residential lawns — the kind with a 38mm to 50mm pile height and polyethylene fibers — will not give you a consistent, realistic ball roll. Putting green turf is an entirely different category: shorter nap (typically 12mm–15mm), denser fiber count, and specifically designed to work with sand infill to simulate the speed and grain of a real bent-grass green.
The infill system is where most homeowners get this wrong. A quality synthetic putting green uses a silica sand infill, precision-spread and brushed into the fibers at a calibrated weight — usually around 1–2 lbs per square foot. Too little sand and the ball bounces unpredictably. Too much and the green plays slow and spongy. This is a process that requires equipment and experience, not just a bag of sand and a rake.
At Grassify, we use Pro Putt, our purpose-built putting green turf product, which is engineered for a true ball roll and holds up to consistent foot traffic across seasons. Whether you want a single-cup chipping area or a multi-break practice green, the fiber density and infill are calibrated to perform.
Design Options for Backyard Putting Greens in Burke and Springfield
One of the most common questions we get from homeowners in Burke Centre, Rolling Valley, and Signal Hill is: “How much space do I actually need?” The honest answer is that a functional putting green can be built on as little as 200 square feet. At that size, you can fit two cups, a gentle break, and enough green to practice 5- to 15-foot putts consistently — which is where most amateur golfers actually lose strokes.
Larger yards in Great Falls or Fairfax Station can accommodate more elaborate layouts: multiple cups, elevation changes, fringe areas with slightly longer turf for chipping practice, and even a bunker surround with sand or a matching crushed aggregate border. The design possibilities scale with your space and budget, but the fundamentals — base prep, drainage grade, correct infill system — stay constant regardless of size.
Key design elements worth discussing with your installer:
- Cup placement: Cups should be positioned to create varied line paths, not clustered together. A good layout forces you to practice different break angles.
- Fringe turf: A 12–18 inch fringe of slightly higher-pile turf around the green edge looks more realistic and allows chipping practice. This is a different product from the putting surface itself.
- Elevation: Even a 2–3 inch elevation change across the green creates meaningful break. This requires shaping the base layer, not just the turf.
- Drainage integration: If your yard already has drainage challenges — common in the heavy clay soils across Fairfax County — your putting green needs to be designed with that in mind, not installed over it.
What Competitor Installers Don’t Tell You About HOA Approval in Fairfax County
If your home is governed by an HOA — which is the majority of properties in communities like Burke Centre or Kings Park — you’ll likely need architectural review approval before installation begins. This is one area where a lot of general landscapers and out-of-state franchise installers drop the ball entirely. They’ll install the green, pocket the check, and leave you to deal with a cease-and-desist letter from your HOA board six weeks later.
HOA guidelines in Northern Virginia vary considerably. Some communities explicitly address artificial turf in their CC&Rs; others don’t mention it at all. A few have started adding putting green-specific language after homeowners began installing them without approval. As a rule, if the green is visible from the street or a common area, expect more scrutiny. If it’s entirely enclosed in a fenced backyard, approval is often more straightforward — but still required in most HOA-governed communities.
We help our clients navigate this process before a single shovel hits the ground. That includes reviewing your community’s architectural standards, providing product spec sheets, and drafting the submission materials your HOA board needs to make a decision. It’s not glamorous, but it’s part of doing the job right in this region. Learn more about what goes into the full installation process in our installation guide.
What Does a Backyard Putting Green Actually Cost in Burke, VA?
Putting green installations typically run between $18–$25 per square foot depending on the complexity of the design, the number of cups, whether elevation shaping is involved, and site access. A straightforward 300 square foot green with two cups on a relatively flat, accessible backyard will come in at the lower end of that range. A 600 square foot green with elevation changes, fringe turf, and challenging access through a gate or side yard will be at the higher end.
Compared to lawn turf installations, putting greens require more precise base work and more labor-intensive infill application, which is why the per-square-foot cost is typically higher than a standard residential lawn project.
Most of our putting green clients in the Springfield and Fairfax area recoup their enjoyment value quickly — especially when they factor in the time and money they were spending on range trips, simulator memberships, or course fees just to practice short-game fundamentals. Having a green in your own backyard changes how you practice.
Frequently Asked Questions About Backyard Putting Greens in Burke, VA
Can a synthetic putting green be installed on a slope or uneven yard?
Yes, but it requires base shaping to create the right sub-grade before the turf goes down. Minor natural slopes can actually add interesting break to the green’s design. Significant elevation changes require more excavation and base work, which affects cost and timeline. Every backyard is assessed individually before a design is finalized.
How long does a backyard putting green installation take?
Most residential putting greens in the 200–500 square foot range are completed in 1–2 days. Larger or more complex designs with elevation shaping or drainage integration may take 3 days. HOA approval, if required, adds time before the project start — typically 2–4 weeks depending on your board’s review cycle.
Will the putting surface hold up through Northern Virginia winters?
With proper base preparation, yes. The turf fibers themselves are UV-stabilized and designed for freeze-thaw conditions. What fails in winter is almost always the base — insufficient compaction, inadequate drainage grade, or using the wrong aggregate. A correctly built green in Burke or Springfield should last 15+ years with minimal maintenance.
Can I add lighting to use the green at night?
Absolutely. Low-voltage landscape lighting around the green perimeter is a popular addition, especially for homeowners in Fairfax County who want to practice after work during shorter winter days. We can coordinate with your electrician or lighting contractor during the installation phase so conduit pathways are planned before the turf goes down.
Does artificial putting green turf require any ongoing maintenance?
Very little. A light brushing with a stiff-bristle broom a few times per year keeps the infill distributed and the fibers standing upright. After heavy rains, the sand infill may need minor redistribution at the cup edges. Leaf blowers work fine for debris removal — just avoid metal-tined rakes that can pull fibers. There’s no mowing, no watering, and no aerating involved.
Ready to Build a Backyard Putting Green That Actually Performs?
If you’re a golfer in Burke, Fairfax, or anywhere in the Northern Virginia area who’s been putting off this project, the best time to start is before the ground hardens in late fall. We design and install backyard putting greens built for DMV conditions — proper base engineering, calibrated sand infill, and turf products that perform year-round, not just in the showroom brochure.
Contact Grassify for a free on-site consultation and design estimate. We’ll measure your space, talk through your design goals, and give you a clear picture of what’s possible — including HOA considerations if your community requires approval. Reach out here to get started.


